Lucy Boston

Showing posts with label Flags of the American Revolution. Show all posts

Thursday, July 16, 2015

rain, rain, go away...

Here in central Ohio, we are enjoying 
(I use the word 'enjoying' very loosely)
more heavy rain, lightening and thunderstorms.  
Again.
Yesterday we had another 2 and a half inches of rain!
I don't know about you, 
but when those electrical storms are ongoing
(like they have been here recently),
I don't plug in any of my computerized machines,
like my sewing machines or the long-arm machine.
I figure it would only take one hit to electrically fry
the components of one of my favorite machines!
Are you the same way?


During the stormy days here, 
I have pre-cut and prepped many blocks -
ready to stitch anytime the storms are not visiting.
I've only stitched together ONE of my Farm Girl Vintage blocks this week!!

I have done some hand-stitching...  
I'm still whip-stitching together 
more of the potholder blocks of
my Flags of the American Revolution quilt.

Also, I've worked on binding another of the baby quilts to gift...
(I know some will notice and ask about the area that's not quilted in this picture... the bottom, left.  I left it un-quilted, so that I could later quilt/stitch in the baby's name and birth date!)

During this rainy-so-far-Summer, 
I've taken some time to visit some blogs -
to live vicariously through others' pictures of 
sunny days, trips and vacations.
 
My favorites are ones that shared their travel photos.
Not just any photos, but specifically 
to the New England Quilt Museum
and the Sister's Quilt show to name a couple.
But the one that has stuck in my head the most is
Wendy's, The Constant Quilter blog (link here),
from her trip to the Vermont Quilt Festival.
So many great pics of wonderful, vintage quilts.

All of those travel photos makes me want to do some traveling!
SO inspiring!; 
But all of those quilt-y photos also cause me a little trouble,
as it makes me really, really, really
want to start another project!!
I do remember my promise to myself 
to finish up some Quilts already In Progress...
I will finish another QIP first. 
I will finish another QIP first.
:)

Hope you are having sunny, stitching days!

Saturday, July 4, 2015

parade, ice creams, and stitching

Happy Independence Day America!!

I didn't get out all of my patriotic decor this year, 
but I did pull out a couple of pillows and quilts to throw on the couch:
 The pillow that I made years ago from an old and faded, red woolen blanket.
This morning, Sweetie and I will head north a few miles 
to attend our local village's Americana celebration.

Sweetie always finds a place to park 
so that we HAVE to walk past one of the local churches' 
homemade ice cream fundraising-stand.
He eats his ice cream as we head to 'our corner' - 
the traditional place where we stand to visit with 
neighbors and extended family that are
gathered along the main streets of the village... 
awaiting the parade.
Our parade is usually about an hour-long...
with bands, bicyclists, 4-H clubs, youth groups,
multiple township's fire equipment, 
politicians, business floats,
horses, antique vehicles and antique tractors.
Rain or shine!,
a little piece of Americana in our little part of the country. 

Afterwards, we will (OF COURSE)
walk back past the homemade ice cream stand
for Sweetie's second serving before
heading home for our own picnic lunch.

This year, Sweetie has to go to work 
(his turn to cover an event from 2 to 11 p.m.)
and I'm planning (and so looking forward to) 
a nice, quiet day -
just sewing and stitching!! YAY!!!

One of the hand sewing projects I'm planning on attacking is this:
my Flags of the American Revolution quilt.
I made these quilt blocks in the Hot Pad or Pot Holder style (where each individual flag is a mini quilt), and I have them about half whip-stitched together.
Every time I have it laid out, 
I think it looks unfinished - like it still needs borders...

What do you think? 
Does it need borders added?  (I'd appreciate your input.)
Since each block is already individually quilted, 
they would have to be border 'blocks'
(which is doable and I already have the fabric). 


Anyway,
I hope your holiday weekend is safe, relaxing,
and wonderful!!
With homemade ice cream and/or stitching time!! :)

Thursday, March 5, 2015

Ready or not... FLAGS (UFQ)!!

Here it is!!!!
It's time to share the 
Flags of the American Revolution finish...
Keyword?  Finish. 
(insert my maniacal laughing here.)  
I admit, I'm not ready to share
because it's not a finish,
as I have an UFQ (UnFinished Quilt)!!
This sew-along was with Lori of Humble Quilts 
(click here to see others' great work)  
and it's always motivating to me 
to sew along with others doing the same project
(thank you, Lori).

My center medallion - all quilted!

Yet, whenever I sign up for a sew-along,
I always think to myself - 
"Sew-along?', 

OR, more realistically,
'start a quilt to add to the UNFINISHED quilt stack?' 
(: again - laughing hysterically here :)

My chosen method of doing this quilt
was to attack it in the Civil War finishing method 
of Hot Pad (or Pot Holder) blocks.
[The Hot Pad method (more pictures & info here) is where each block is completely finished individually, then whip-stitched together to create a quilt.  I used the knife-edged method for each flag, choosing a backing for each block - layering right-sides together with batting, sewing around the outside seam, leaving a turning hole, then turning, pressing, closing the opening and quilting.]
Flags of the American Revolution - blocks quilted and pinned together
Blocks pieced and appliqued?     Check.
Blocks quilted? 
Check.  Well, except for my signature block (bottom right corner, above).
Blocks pinned together, ready for whip-stitching?  
Again, check - except for the not yet quilted siggy block.
Do I love it??  
Check, Check, Check!!

I just need another month,
not another partially finished quilt!  lol 
But I suppose I am further ahead than some folks in this sew along, 
as I don't just have a quilt top,
but a bunch of quilted hot pad blocks.  
Any way you look at it, 
it's another UnFinished Quilt for the stack. lol

Here is the back of my quilt, showing the fabrics I chose for each block back:
Block backs, pinned together, awaiting whip-stitching.
And the eagle medallion with a corner of the block's back fabric showing:
A few more pictures:
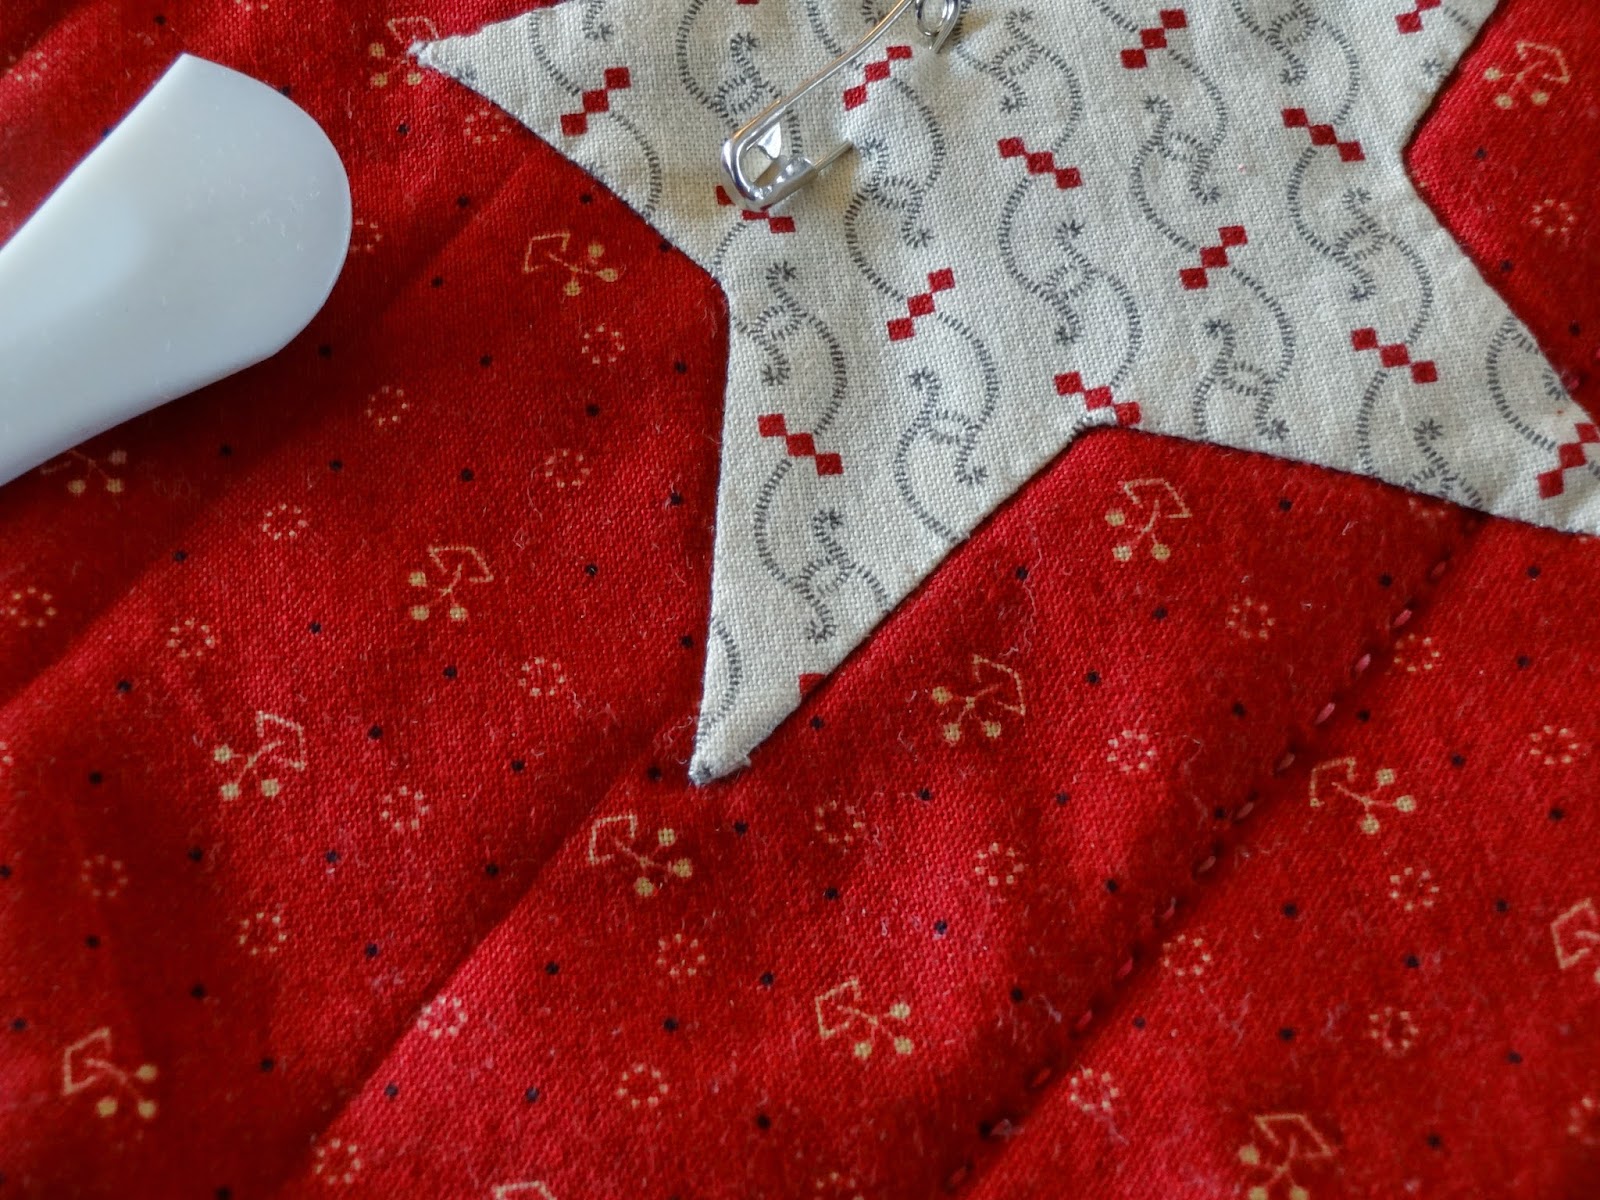
Marking quilting lines with my Hera marker.
Close-up of quilting- bottom, right corner; and marked lines- top, left corner.
Quilting on eagle medallion.
Quilted star and star buttons.
Another close-up of quilting.
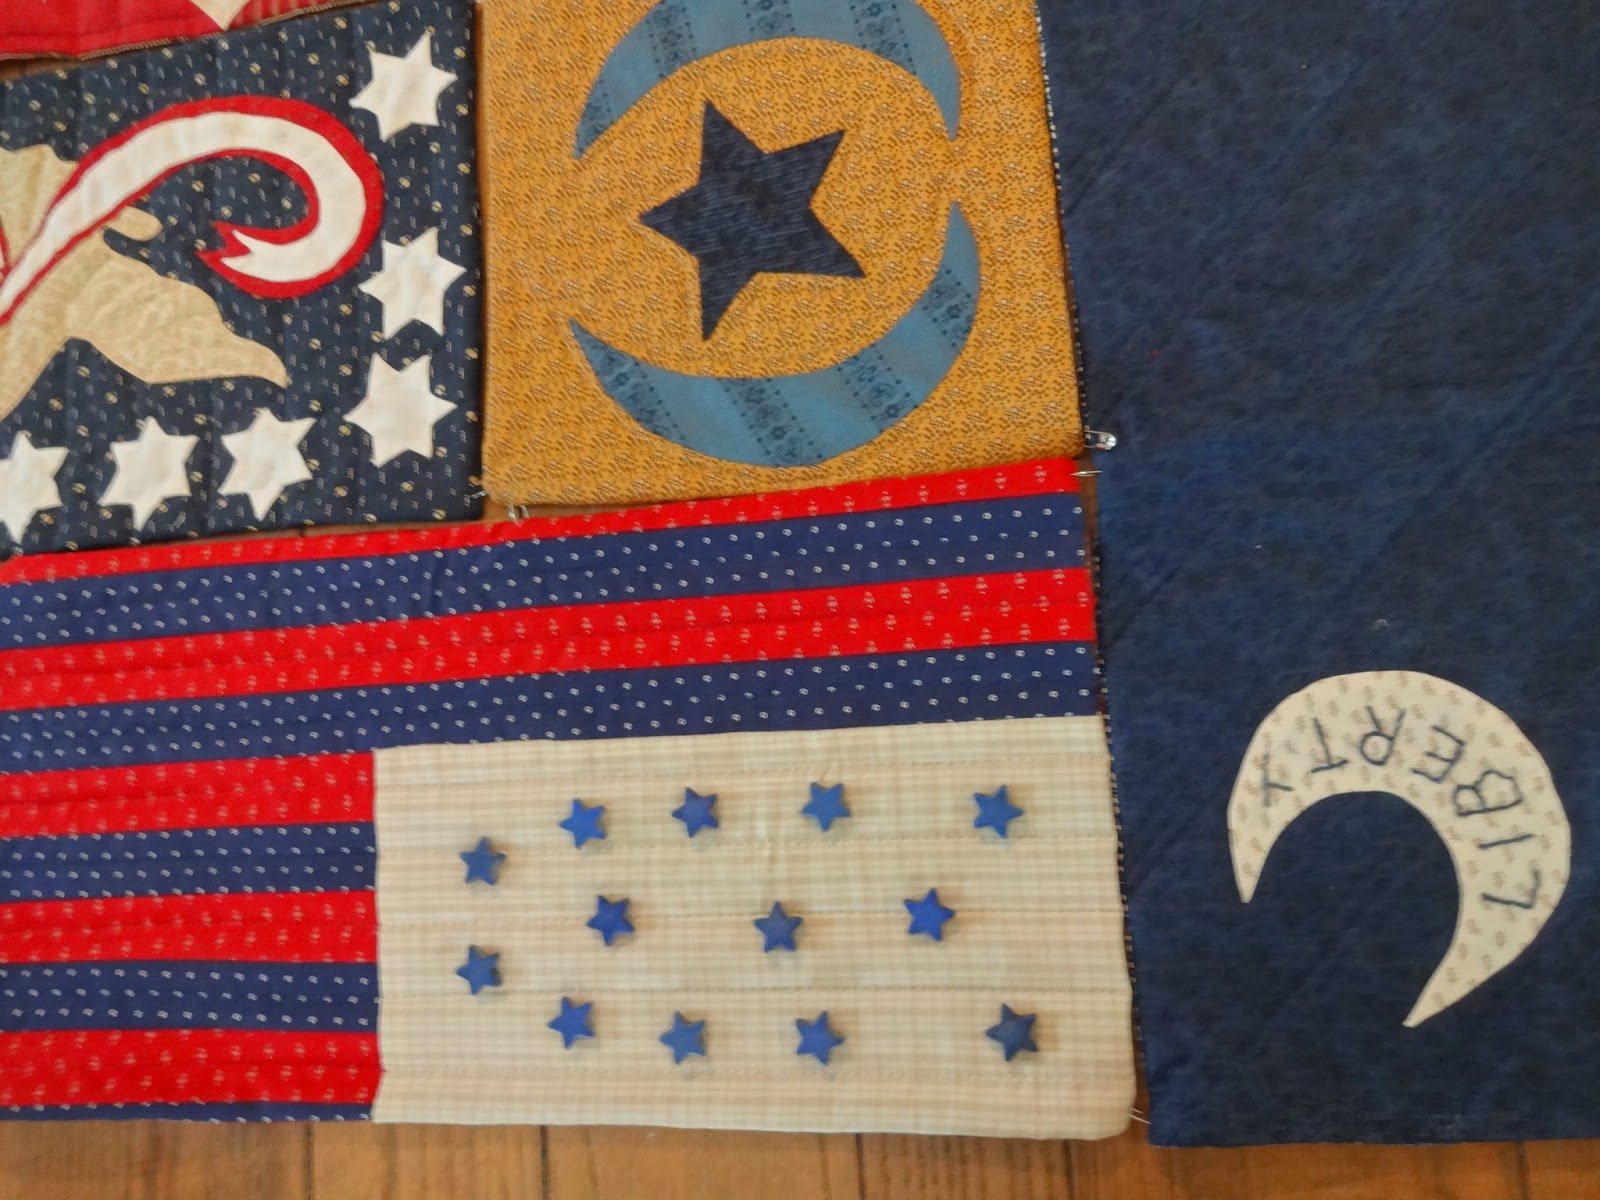
I finally found blue star beads for this flag.
More quilting close-ups.
After I get all the blocks whip-stitched together, I think I will add a border and binding...give me another few months for that! :)

So, though it's not completely finished (and I have another UFQ), 
I do love it, and it was a fun to work along with others from around the world
doing the same quilt at the same time!

Please, if you have a few minutes, do go visit the others who did this quilt.  There is some great talent to see out in the quilting world.

Thanks for visiting, and if you have questions about my Hot Pad finishing method, please leave me a comment and I'll try to explain further.
Happy Stitching!

Tuesday, February 17, 2015

antibiotics to igloos and stitching to jumbalaya

Half way through my antibiotics, and I can now move without feeling that my barometric head is pressurized and about ready to explode.  Though the 24 hour flu virus has invaded my area, I've not succumbed as of yet, and I'm not planning on it either! :)
It's still partly sunny with a chance of igloos in my neighborhood:
I'm thankful I can be inside where it's cozy and warm.

So, what quilt-y something have I accomplished in the last few days?
Not much...
I added a border to one block (of the last row) of my Lucy Boston quilt work-in-progress.  Well, really I only stitched together the pictured bottom six cream pieces:
Lucy Boston, Patchwork of the Crosses
that I'm hand-stitching, English paper-piecing (1 inch size).
 Then I jumped turned over to this:
My signature block for Flags of the American Revolution,
pattern by Jan Patek.
 Yep, I applique-stitched the star, the the letter L and some of the letter S.

Then I dug through my recipe file box and found my Jumbalaya recipe that I've adapted for the slow-cooker.  I've pulled some sausage and cooked chicken from the freezer, so I'll start that tomorrow morn. (In my world, there's no shrimp, so that will be a side to be added if you want it).
That means dinner tomorrow night is planned.

Not many accomplishments so far, huh?
Glad it's only Tuesday!!

Hope your week is starting out well, and 
Happy Stitching!

Sunday, February 8, 2015

Flags of the American Revolution part 6

I am completely out of order on my flag blocks for this Sew Along!

I had already stitched the flag with the blue ground/13 appliqued stars, that I think was really 'due' this month...
Because it was already done, 
I went ahead and stitched this block this month:
(it is 'assigned' for next month, so I'm ahead again! :)
 
I laid out my blocks:
I'm still auditioning colors: the center medallion is laid in, unfinished, 
as I've not chosen reds for those corners.  
The block directly below that 
with the chunk of red fabric on the cream, unpressed fabric -
that's the missed block from months ago.
So besides my 'signature' block, I found that I still need to make 
a striped flag with blue ground and circle of stars 
(that gets placed toward the bottom, center).  
That means I'm behind again... :)

Because I'd decided to individually finish and quilt each block
in the Hot Pad* or Pot Holder* method,
I've been working towards that quilt-the-blocks-goal,
so here are a few pictures of my blocks in quilt-y progress:
Knife-edge finished blocks pinned together awaiting whip-stitching.
Did you notice the safety pins in the above four pictures, 
holding the block corners to the other blocks?
That's how I pin to position the finished blocks- 
so they are ready to pick up and whip-stitch together
whenever I have a little stitching time.


* Hot Pad/Pot Holder quilt method:  if you'd like more info on this method,
I've shared previously and you can read about it HERE, and HERE.

I'm linking with Lori, of Humble Quilts; 
she has pictures/links to other participants in the sew-along if you'd like to see their progress, too.

Thanks for visiting, and Happy Winter Stitching!

Monday, January 19, 2015

flags & a tutorial for Hot Pad blocks - knife-edged method

Flags of the American Revolution Sew-Along... 
This Sew-Along (with Lori of Humble Quilts)
is a pattern by Jan Patek,
and if you don't know, a Jan pattern is kind of primitive...
the seams don't have to match,
points can be cut off, and
fabrics can be mismatched, using whatever you have on hand. 
So if there's some applique that's not turned under smoothly
or a point is not pointy, it just adds to the primitive charm.
No worries. 

With that primitive charm look/style in mind,
I've started quilting my blocks individually,
deciding to use the 'primitive' Hot Pad method to finish this quilt.

In this instance, 
I'm using the knife-edged block, without individual block bindings:
Quilted block on the left, stack of blocks on the right still to do.
For those who asked me previously 
about the knife-edged Hot Pad method of finishing blocks,
here are pictures of my block progression:
#1 - Cut your batting the same size as your finished block.
#2 - Cut your backing fabric at least an inch larger than your finished block size.
 #3 - Layer backing right side up, 
centering the quilt block right side down, 
with batting squarely on top.
#4 - Pin well so the layers won't shift as you sew around your block, above... Note the double pins at the bottom, designating the no-sew area for turning the block through to right side out.
#5 - Stitch with your usual 1/4 inch seam allowance, leaving a generous opening to turn the completed block right side out.  (Don't allow your batting to stretch while stitching!!)
#6 - Above, trim corners of all layers after stitching.
#7 - Before turning the block right side out, 
check the raw edges around your block to make sure you've caught all layers.
 (You want to see your backing and the quilt block
  that are right sides together, with your batting on the top of that.)
#8 - Block is turned right side out, using the Hera Marker to push the block out to seams and corners out squarely.
#9 - This picture shows a block BACK.
Press the block well, then turn in seam allowances 
at the opening left from turning block right-side-out;
#10 Hand whip-stitch closed with matching thread (not shown).

#11 - Block has 'scored' indentations from 
Hera Marker for possible quilting lines, 
and then is pin-basted in preparation for quilting.
#12 - Block on the left is quilted.
The stack of blocks on the right are marked and ready to pin-baste for quilting.
At this point, all the completely finished blocks are ready to layout in their quilt position and to be whip-stitched together!
(The original quilt has borders and binding, and I think I will add those also, but will wait to see as it all comes together.)

Let me know if you have questions after reading this little tutorial.  It makes sense to me, but I/we already know that everyone processes info differently, so my way works for me but may not be easy for you to understand. :)

Back to some stitching for me.
Happy Stitching to you also!


Tuesday, January 13, 2015

Tuesday, Tuesday, Tuesday & naps

Another week -
the second week of the year is almost gone already!!
And, it's still 'Igloo cold' here in central Ohio.

I had a break from my quilting,
as I got to keep the grand-kiddos aka: the little guys
while Sonnyboy and his beautiful wife-y had the chance to go to 
the National College Football Championship Game in Texas.
Way to go Ohio State Buckeyes!!

It was a wonderful Sunday, Monday, Tuesday for me.
But now I know why the Good Lord has the young having babies!
Man-O-Man am I bushed!!!
They are good grand-kiddos -
a three year old and a molar-teething one year old that's walking
kept me on my toes (and out of sleep :)!
I am so blessed that they live close and love to come to GrandmaB's!
And Sweetie and I were able to watch the final playoff game from our easy-chairs after grand-kiddos went beddy-bye.

Anyway, what all that means is that my in-progress quilting project - Flags of the American Revolution, got stacked and piled onto the sewing table in my quilt studio (aka: spare room, aka: Sonnyboy's old bedroom).
Here's the layout of blocks before said stacking and piling:
I still don't have the quarter-square-triangles on my center eagle medallion...
I'm going with 'I'm still auditioning fabric colors'. :)
Note: the folded fabrics on top of some blocks?
That is the backing fabric for each block.
Yes, each block's backing, 
as I've decided to do this quilt in the hot-pad method,
with knife-edged sides 
(more on that later).

Now that the grand-kiddos are back home with their parents 
and I've had a nap,
I've unstacked the previously stacked and piled project
to work on the rest of this week.
But maybe with another nap scheduled in.

Happy Tuesday and Happy Stitching!

Tuesday, January 6, 2015

Snow play day and a little freaking out here

Snow day equals sew day in my house!
YA!
It's bitterly cold here and the snow is blowing, but beautiful.
The snow plow trucks are scraping and salting outside
and here inside, the needle is flying.
But it's not the cold/snow that's freaking me out.
I just did an inventory on the blocks remaining to do
in my Flags of the American Revolution quilt project. 
There are just three blocks left!
The last block is a little scary when I think about it.
It's the 'signature' block,
where I'll applique my first initial/last name
onto a 10x20 inch block of fabric in 1 1/2 inch tall letters.

OK, I'm not really FREAKING out,
but freaking out.
My last name is 11 letters.
Yes, ELEVEN!!!!!
And, to top off the 11 letters issue?
The block's length is in the quilt vertically.
Yep.
So.
If I had had ANY forethought,
I would have stitched one of my other, already done blocks in the other layout configuration and switched their placement.

Well, I didn't have the forethought & 
I'm not redoing any of my finished blocks,
so I've laid out A.L.L. 
my (so far) freezer paper letters in three different ways.
I have a preference, but  
which configuration do you like the best? 
 option A - last name all down the side,
with or without the second, bigger star 
 
option B - last name across and down
option C - last name curved
There is some embroidery in some of the other quilt blocks, so
hand-embroidery would be another option.
Anyway, I'd appreciate your opinion
and look forward to hearing your wisdom.

So I'm putting aside the freaking out, and
back to snow play time for me!

Happy Tuesday!

Friday, January 2, 2015

Flags of the American Revolution part 5!

It's sharing time for the Flags sew-along again.

In the photo below, my Sawtooth Stars are on the left, 
Three Crescents of South Carolina on top/right,
Star and Moon blocks below that,
and far bottom is the Liberty Moon of Fort Moultrie:

I thought,
just for a few days there,
that I was caught up 
when I finished the 'assignment' for December.
Then, laying out my finished F.A.R. blocks, I realized that 
I'm still behind (missed doing one block in maybe October).
But I am ahead, too (did the wrong block when I missed the October one).
So, I'm still calling it even. 

I like to lay my finished blocks all grouped together
to help me in choosing the next flag blocks' colors.
It also helps me when I take a photo of them then,
to see if any color just doesn't play well with the others in the group.
Here's the latest 'group shot':
I love how the quilt is coming together!
And, again, thanks to Lori of Humble Quilts for organizing this F.A.R. sew-along.
If you'd like to see the lovely block finishes of others participating in this sew along, you can click on the Humble Quilts link, above.  There are some GREAT blocks!

Finally, here are close-ups of my fabric choices:
   
The greens and blacks of my Sawtooth Stars.
The blues and creams of my Three Crescents of South Carolina
and Liberty of Fort Moultrie flags.
The golds and blues of my Star and Moon Blocks.
I think that all of my fabrics used so far have been Civil War reproductions.  I wasn't purposefully pulling those, but really like how the colors are so cohesive together.

Also for me, it's almost time to decide how to quilt it.  I look so forward to the quilting, but have a hard time deciding how to finish it off.  Wonder if others stall at this point also?


Happy 2nd of January, and Happy Stitching!

Saturday, December 6, 2014

Flags, part 4

Flags of the American Revolution (a sew-along with Lori  of Humble Quilts fame),
 and it's time to share!

In the nick of time to share along with the participating group, 
I've taken a picture of my hand-appliqued block
that was part of this month's 'assignment':
I REALLY like it!  It was a whole lot o' little points to turn under.  And if I cared just a little more, I'd un-stitch and re-do that white point up near the eagle's beak.  But, I don't, so I'm not.  I think it adds just a little more character.

Here's a picture that tells the real, more complete story:
I still have five more stars to stitch down on this flag!!  
And, I didn't make a single one of the 
pieced star blocks that were also assigned.

Instead of being home and doing the usual 
getting ready for the holidays and cleaning 
and decorating and baking and then stitching in the evenings, 
I've run off with Sweetie and the Sonny-boy 
and his family and made some 
MAGIC memorial moments in the Florida Disney parks.
Oh, and I've walked my feet off !!  
(It's been a whole lot of fun, though much more tiring.)
We're driving home today and tomorrow, 
so maybe, sort of back to the usual schedule this coming week!

Happy weekend and Happy Stitching!

Thursday, November 6, 2014

star buttons American Revolution Flags

I finished the blocks that I THOUGHT were the October assignment
from the sew-along on Flags of the American Revolution (a Jan Patek book).
I missed one and stitched a different one.
Does this mean that I'm behind and ahead of myself? :)
Sounds like I'm going in circles, doesn't it?


Anyway, behind/ahead aside,
like others doing this stitch-along,
I've wondered what to do for the star buttons on some of the flags.
The book/pattern is five years old, and the recommended buttons source is no longer available.

 
I need 13 blue star buttons for one flag, 
and for two of the flags, I need 13 buttons each...
26 star buttons in vintage-looking cream.
I haven't found the blue buttons as of yet,
but I did I find some buttons that are bright white 
(quilt-shop: Dill Button Co., 15mm).
I'm not a bright white type of quilt gal.
But, I figured I could somehow 'antique' these white stars...
 I tried black shoe polish - 
 yeah, that just waxed them and the black came off.
I tried the product Distress It - 
that just stained my fingers and nails, not the star.
I tried tea - too weak for dying, but tasty!
Then I had an eureka moment.
Coffee! Steaming hot and very, very, very strong coffee!
left-black polish; center-distress; right-coffee sludge.
I dropped the star in the coffee sludge and left it until the thick brew cooled.  Laid the star on toweling to dry, and WA-la!

I think I like i!
In the pictures, it's subtle.  
But not stark, bright white anymore.
Just what I was hoping for!
 
You can visit more folks' work on 
the Flags of the American Revolution
by stopping by Lori's blog: Humble Quilts.
There are some great looking flags and fabrics and work!